|
|
VSAAB
-- The Vintage SAAB Information Source! VSAAB Articles Sonett Interior Restoration |
 |
|
|
VSAAB
-- The Vintage SAAB Information Source! VSAAB Articles Sonett Interior Restoration |
|
| Most Sonetts suffer from similar problems with the interior. The most frequent ailments include: droopy headliner, warped door panels, soiled or worn out carpets and damaged panels in the trunk area. | |
|
|
The simplest way to fix all of
the above is to drop your car off at the local upholstery shop along
with a blank check. Since �simple� is not part of a Sonett
owner's vocabulary, a few do-it-yourself tips should be helpful.
Although the following is about Sonetts, owners of 93s, 95s and 96s
can also benefit from much of the information found in this
article. Headliner Depending on the year of your Sonett, the headliner is made of vinyl or cloth, glued to foam backing. The foam backing is glued to the fiberglass roof with contact cement. The foam eventually separates from the vinyl or cloth, resulting in the ever-popular "headliner on your ears" syndrome. |
|
After removing the
roll bar and vinyl or cloth, remove the foam using a fine-toothed
wire wheel on a drill or disc grinder. Wear a facemask and eye
protection because pieces of foam will literally fly everywhere.
Scraping the foam off with a razor is not as messy, but will take
longer than using a wire wheel. After foam removal, clean the
fiberglass with paint thinner or mineral spirits. All remnants
of foam must be removed. Door Panels Door panel upholstery consists of a vinyl sheet with a piece of carpet sewn to the bottom. The upholstery is glued and stapled to the fiberboard door panel. If the upholstery is in good shape but the door panels are warped, here is what to do. Remove the metal trim where the door lock knob goes through the door panel. Remove the staples from the back of the door panel. Gently peel the upholstery off the door panel. Replace the door panel with water resistant interior panel board. Door panel board comes in 1/8� thick sheets and is available from any automobile upholstery shop.
If your door upholstery is damaged, go to an automobile upholstery shop to discuss your options. Sometimes the carpet on the bottom of the door panel is in good shape and can be reused. If so, pull out the thread that attaches the carpet to the vinyl and re-use. You can save as much as 50% of the replacement cost by having the upholstery shop sew the new upholstery covers only, using your old ones as a guide and applying them to the door panels yourself. Remember, time is money so if you can do it yourself, why pay someone else to do it? Don�t forget to replace the plastic vapor barrier behind the door panels before installation. |
|
|
|
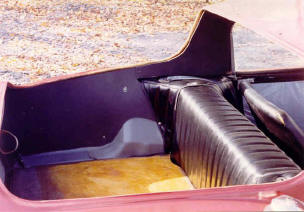
Trunk Basically the same story as the door panels, in that you will need to replace the upholstery as needed. Mount the upholstery to new, water resistant panels. To mold the panels to the trunk sides, proceed as follows: Before gluing on the upholstery, wet down the panels with a sponge. Screw the two trunk side panels in place. Force a few pieces of wood between the two panels, bending them where needed. The panels will hold the new shape when dry. Don�t forget to replace the insulation behind the side upholstery (Sonett II and III) and the rear panel (Sonett III only) for sound deadening. |
|
Carpets A little rug shampoo and a damp mop or rag will remove most dirt and stains. Incredibly, you can run them through the washing machine on the gentle cycle with excellent results. Allow the carpets to drip dry; do not put them in the dryer. To replace the carpeting, try to find a suitable remnant at a carpet or department store. Cut out the new carpet with a razor knife, using the old pieces as a guide. After cutting, bring the pieces to an upholstery shop to have the edges bound like the originals. For additional sound deadening, you can have foam or padding glued to the bottom of the carpets. If carpet slippage is a problem, glue Velcro strips to the underside of the carpet and floor. |
|
|
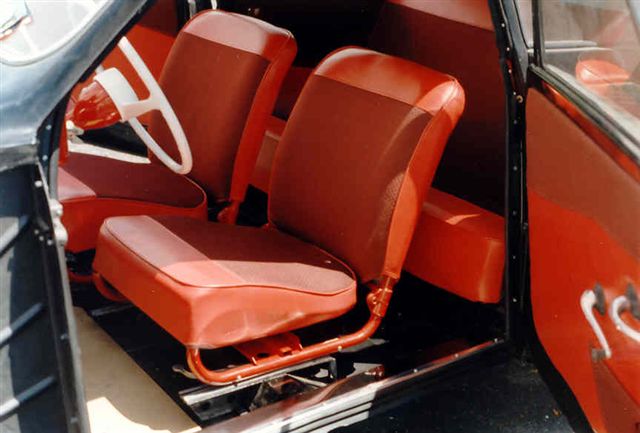
Seats Unless you�re experienced in the art of seat repair and re-upholstery, this is a job for a professional. Cost will average $200 to $300 per seat. The tan (camel) color vinyl on Sonett III seats is difficult to match perfectly because of the grain, but a very close match can be made. The ribbed cloth on the seat inserts is impossible to match, but a close match can be made. The smooth black vinyl on Sonett II/V-4�s seats is an easy match. The black check vinyl on the seat inserts and doors are identical to that found on early VW Beetles and Porsche�s, so an exact match is not a problem. When it comes to sourcing new upholstery you should plan on visiting more than one upholstery shop. Search through the piles of swatch books until you find the best match. If you don�t like what you see, don�t use it! If you do, you will kick yourself every time you get in the car for not looking around more. Bottom line - don�t settle on a match you can�t live with. Final Advice Take some pictures of the upholstery before doing any work. The photographs can come in mighty handy when trying to line up panels and seams like the originals. Keep a record of the manufacturers name and part number for all upholstery used. You never know when you might need to buy more. Before removing old upholstery, check for shrinkage. If the old piece has shrunk from age, using it as a template for making a new piece can spell disaster. A perfect example of this is the Sonett�s gas tank bulkhead cover - once removed, it can �shrink up� an inch or two! Beware!! |
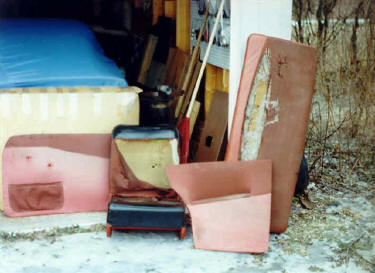
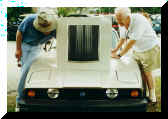
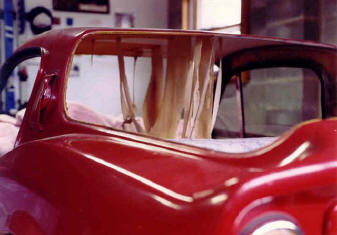
Don't let a bad interior scare you away from buying a car. Take a look at these before and after shots!
|
So, what do you think of this? Send us your thoughts and comments by clicking HERE!
|
Help keep VSAAB alive and well! Click the icon to use PayPal for your donation, and THANK YOU! |
All product and trade names
mentioned on this site are the trademarks of their respective companies.
�VSAAB,
1998-2002 All rights
reserved. VSAAB is not affiliated with SAAB Cars USA or SAAB Automobile.
"VSAAB" is a trademark of the San Diego SAAB Owner's Group, San
Diego, California USA.
All information here is presented as personal opinion. Ask, think, do.
Last modified: January 10, 2023

 Trace
the old panel on the new one and cut out with a razor knife.
Drill or cut out new holes for the window crank, door panel clips,
pull handle etc. Reattach the upholstery with contact cement.
Stapling is not necessary.
Trace
the old panel on the new one and cut out with a razor knife.
Drill or cut out new holes for the window crank, door panel clips,
pull handle etc. Reattach the upholstery with contact cement.
Stapling is not necessary.