Here's a short story that proves once again that Vintage Saab
ownership is full of fun and laughs.
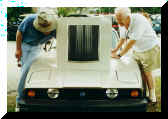
During the
restoration of my 1961 96, I discovered that the fresh air intake
at the base of the windshield was filled with leaves. The air
intake is nothing more than an empty box covered by a slotted
grill and intake scoop. Since I was painting the entire car and
the intake scoop was all rusty, I decided to remove the scoop to
make repairing the rust easier. I also thought that once I had the
scoop off I could somehow remove the leaves that were trapped
underneath.
I knew from
past experience that the two screws holding the scoop to the body
are often seized from rust. Mine were no exception. One good twist
with my Phillips head screwdriver and the screw heads stripped
instantly. Screw removal was no longer an option.
I grabbed a
pair of tin snips and cut the metal tabs under the scoop, on
either side of the mounting screws. The scoop fell off. Now with
better access, I locked a large vise grip to the screws head and
turned. Snap! The nut on the underside of the grill
slots twisted free. Apparently the nuts are crimped in underneath
the grill slots and twist free with very little pressure. Using
the vise grip to pull and wiggle the screw head from side to side,
I pulled the screw out with the nut still attached. This left a
jagged hole were the nut should be. Repeat process on other screw.
I locked the
nuts in a vice and twisted the screw head with the vise grip,
snapping the screw in half. This allowed me to gather up the
bottom part of the thin metal tabs that I had cut with the tin
snips. Turn on MIG welder; reattach the metal tabs to the bottom
of the scoop. Place scoop over air intake to check fit. Sorry, the
tabs are not welded on straight so the scoop will not lay flat on
the car. Cut tabs with tin snips, repeat process.
Now, what to
do about those nuts that pulled through the intake grill slots. I
have to somehow get the nuts to stick on the underside of the air
intake grill. I found suitable nuts and threaded two-inch long
bolts through them. The next step was to wiggle the nuts through
the buggered up holes in the grill slots. I Tied a thin
piece of string around the bolt heads and attach the other end of
the string to a nail hammered into the ceiling. The string kept
upward pressure on the nut, holding it fast to the underside of
the grill. OK, turn on the Mig, attempt to weld the top of the nut
to the buggered up hole, without welding the bolt to the nut.
Twang, sparks burn through the string, repeat. Weld a little more,
check to see if the nut is attached to air intake grill by
pressing on the bolt. burn finger. nut pulls away from grill,
repeat. Weld some more, buggered up hole burns through and is now
larger, nut and bolt falls out, repeat. Weld yet again, press on
bolt with pliers (I learned!), nut is secure.. But the bolt is now
welded to the nut! Two days and a thousand #@*! later, both nuts
were securely welded to the underside of the grill.
Time to pull
the leaves out from under the air intake grill. Using hemostats I
was able to pull one leaf fragment out every thirty seconds. At
that rate it would take about a year to finish the job. I then
noticed that the best way in there would be through the heater
core opening, but the heater core would have to removed first. I
tried to remove the heater core cover but the
screw heads striped out with the first turn of the Phillips. Hmmm,
what about through the fresh air vent under the dash? That hole is
not as large as the heater cores but it should get the job done.
The vent flap is hidden behind the glove box. Remove glove box
door, radio and cardboard glove box. Pull on vent flap handle
while pulling on return spring with a pair of pliers to release.
Break Spring. Remove vent flap and watch the foam seal that
was glued to the vent flap crumble into a pile of dust.
Now to remove
the leaves. I inserted a three foot long, �" diameter
heater hose in the end of my shop vacs suction hose. This gave me
a "snake-like" tube to work with under the dash. A
little electrical tape was wrapped around the hose to make a tight
seal. The hose was inserted through the fresh air vent opening. I
worked it back and forth to suck out the leaves. This worked
halfway decent but under the leaves, lying in the bottom of the
intake box, was slimy dirt that the vacuum hose rode over. I
needed to press down on the end of the hose while
simultaneously moving it in and out. I thought about shooting
water through the air intake grill with my garden hose, blasting
the dirt out. This would have filled the car with sludge and taken
forever to dry out. I planned on coating the inside of the air
intake box with rust inhibiting paint and didn't want to get
everything wet.
My front
windshield gasket had just arrived from Motorsport Sweden. The
windshield had to come out before painting the car so this was as
good a time as any to remove it. With the windshield removed, I
stood inside the car with my torso sticking out through the
windshield opening. Now I was able to get back to work. My right
hand was under the dash moving the vacuum hose back and forth
while my left hand, holding a long thin screw driver passed
through the air intake grill, pressed down on the end of the
vacuum hose. Success at last!
Now to paint
the inside of the intake box. but how! I wanted to use
"Miracle Paint", because it would neutralize the rust
and provide a watertight seal. Getting it in would not be
easy. I tried tying a small sponge to the end of a stick and
shoving it through the fresh air vent under the dash. There was
not enough room to maneuver; I got more paint running down my arms
than inside the intake box. Next, I removed the foam pad from the
end of a one-inch wide foam brush. The pad is connected to a
plastic insert that is pressed in the wood handle. With the handle
removed, I was able to grip the plastic insert with a long pair of
hemostats. Totally frustrated, I dumped the miracle paint through
the air intake grill and shoved the foam pad through one of the
grill slots. By wiggling the hemostat I was able to slosh the
paint around. This was repeated along the length of the intake
box. The only disadvantage to this "dump and slosh"
method was the excess paint ran out of the intake box drain slots
and into the engine compartment. A few strategically place rags
would have protected the engine compartments paint finish.
Repairing the
deep rusty scale on the air intake ribs was comparatively easy. I
just wire wheeled the ribs, treated them with Miracle Paint,
smeared on body filler with my fingers and sanded them
smooth. A piece of cake!